And like that… She died…

I am so upset and quite angry right now. 

My Intelli seems to have just packed up. 

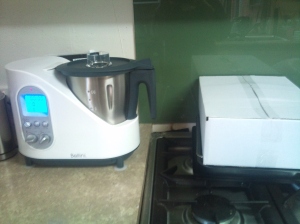
I had just put some cheese in the bowl to ‘grate’, which I do quite often. It started OK, but then just stopped. The motor was still going but the blades stopped spinning. I checked and there was no more cheese than normal, and cut into the same size as normal, but something seems to have gone wrong :(. 

I decided I would empty the bowl and see if it would spin with nothing in it, but the same thing happened. The blades more ever so slightly while the motor was going crazy. I took the blades out and re attached them and that seemed to work for a minute, so I added half the cheese back into it, and it now wont work again. 

I then resorted to every tech heads favorite instruction and turned it off at the power and turned it on again. Even that didn’t help!!

I am so upset. I have been telling just about everyone I know to go and get an Intelli and not to worry about a Thermomix as I have been SOOOO impressed I had seriously been cured of my Thermomix lust. Now… I don’t know what to think…. 

Has anyone else had this problem? 

I plan to pull it all apart tonight and give it a wash and try again in the morning to see if a night off is what she needs, but I am so disappointed right now.

Signing off now, I have cheese to finish grating. I am glad I got the pizza base dough done earlier today! 

L x

Using the Intelli as a rice cooker – sorry no photos!

Hi all, 

Sorry, I have been a bit quiet recently! So I thought I would post a quick recipe!

We prefer brown rice at our place and I was never able to master cooking it in a traditional rice cooker, and I only ever managed to get it right two out of three times on the stove… 

This is where Ellie stepped in and has saved my bacon! (or should I say rice?)

I have to say I rarely weigh anything or use measurements, so bear with me, and be brave!


STEAMED BROWN RICE

Ingredients:

Your quantity of brown rice

Pre-boiled water up to the 1 liter mark on the jug (you can boil water in the Intelli, but it will take you a long time, I find boiling water in the kettle then putting it in the jug works best for this recipe)

Method:

Put your brown rice in your steamer basket and rinse thoroughly (until you water is dry). I use about 1/8 – 1/6 of the steamer basket worth. 

Fill your jug with boiling water up to about the 1 liter mark.

Insert your steamer basket with your washed rice in it.

Set time to 30mins, temperature to 100 degrees and speed 2. 

Walk away and go and do something fun!

When the timer goes off, leave your rice sitting for about 5-10mins, then pull the steamer basket out. Use the little hook on the back of the spatula for this. 

Cool your rice quickly and safely, or serve with your favorite stir fry! 


I normally try to cook a batch a week and freeze it in ziplock bags in single serving sizes for easy to whip up meals. Love it and SOOO easy! 


Black pepper and orange pate 

I love a bit of offal…

And when I say a bit, pate is about my limit. I like to think that I could and would try anything put in front of me, but I still squirm every time the Two Hairy Bikers declare their love for black pudding.

After hunting online, I found a good well reviewed pate recipe that I have now tweaked to my taste! This is so cheap to make, and so super easy in the Bellini, the hardest bit is waiting for it to set!

Thank you to Thermomix forum member Gertbysea for the original inspiration for this recipe. You can see her Thermomix version here http://www.forumthermomix.com/index.php?topic=1808.0

I am trying to get to the Vic Market once a week to fill our house with fresh fruit and veg and gather some inspiration for a new side project of mine, Runwell Nutrition which is a cooking class and demo business – check it out here www.facebook.com/RunwellNutrition  (yes, Ellie will feature heavily in most classes!). I love getting to know the store holders and I love the delight on the chicken shop man’s face when I ask for fresh chicken livers. Maybe I don’t look like your average offal buying customer?

Here is my recipe:

Black Pepper and orange pate

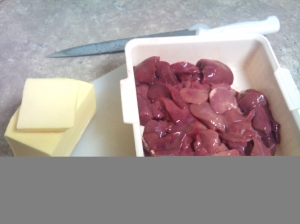
This is how much pate I got from buying 600g of livers.

520g trimmed, cleaned and dried chicken livers (I started with just under 600g and trimmed off all the sinew and any green marks on them. The green is from bile juice from the bile duct and this gives a nasty bitter taste to livers. So ensure you don;t have any left on!

300g salted butter

1 bouquet garni

1 onion

2 small cloves of garlic

pinch salt

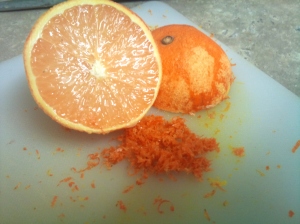
zest of half an orange

juice of half an orange

pepper

 1) Clean, dry and trim your livers. I find this easiest to do by rinsing the livers in a large plastic colander and draining for a while then patting with paper towel and then trimming them up. Set them aside for now.

2) Toss your onion and garlic into the bowl and chop for 4 – 6 sec on speed 7.

3) Add 25g butter and cook your onions and garlic for 5mins on speed 1, temperature 100degrees.

4) Add your livers, the bouquet garni, and a good grind of pepper to the bowl and cook for 8mins on speed 1, temperature 100. (I did consider swapping the blades over to the stirring blade set, but thought I would give it a go without – and the chopping blades were fine on speed 1!)

5) At the end of this cooking time carefully remove the bouquet garni (mine was wrapped around a blade so it was a little tricky getting it out, so be careful of the blades!) add the remainder of the butter, the salt, the juice and the zest and whizz your mix for 45 seconds working from speed 6 – 9. This gives a lightly whipped texture which is divine!

6) Serve into ramekins and pop in the fridge to set.  You can melt butter or ghee on top of your pate to seal it if you like (if you are giving as a gift for example) but I simply cover with cling film and pop it in the fridge. Any pate you wont eat in three days, pop in the freezer! 

This pate freezes well, just make sure you let it defrost in the fridge properly as I can’t imagine it would go well being microwaved…

Give it a go – this is so simple to make and you will get an amazing pate for far less than half the price of what you would pay at a deli!

 Happy cooking!

She has finally arrived!! (Raspberry jam recipe attached)

Well, after many a long week, my replacement Intelli has landed on my bench top.

The design is exactly the same as the original machine. No difference in looks whatsoever! One major difference is that it came with an extra set of blades which are blunt for stirring I presume. (Makes up for the reverse function of the thermomix perhaps?)

A couple of software differences I have noticed are that the lowest temperature is now 37 degrees (I think this counts as keeping food raw?) as opposed to 40 degrees of the old machine and it now has a steam temperature above 100 degrees. (I guess this is close to the thermomix ‘varoma’ temperature?)

My new Intellli Kitchen Master sitting pride of place on the bench

Since it arrived on Thursday afternoon I have given it a really good hard working out! (I had been at a thermomix demo during the day so was super excited and inspired so pretty quickly got to work smashing out some meals!

The first thing I made was a risotto (lucky as I didn’t have anything planned for dinner!). I loosely followed the recipe in the Superchef booklet, with my own changes. When I nail down a great recipe for it, I will share the love I promise!

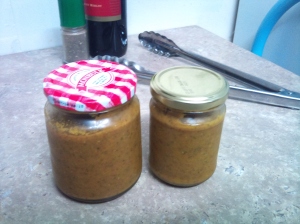
After the risotto I made vegetable concentrate (stock). The recipe in the Superchef booklet was quite different in salt quanities to that in the thermomix cookbook, so I up’d the amount from 75grams to 110grams (thermomix suggest 150grams from memory), with a whole bunch of veggies and herbs. I was quite nervous about making this, as this was the first thing that burnt in my original machine.  This worked out beautifully and I now have two jam jars of homemade veggie stock to use in my cooking. No fillers,  no ‘e’ numbers, no nasties that I can’t pronounce!

The recipe made two jam jars worth of stock. I’ll pay more attention next time and write my recipe down for you all!

The bowl cleaned so easily, a quick rinse, add one litre of warm water, 20 secs on speed 8 and a bit of a wipe was all that I needed!

As I said, during the day I had been at a thermomix demo (my fourth) and the consultant had made strawberry jam.  I decided to take the plunge and give it a go. It was getting late so I thought it would be now or never, and I could soak the bowl in vinegar and water overnight if I needed.

I always have frozen berries on hand so pulled out some frozen raspberries and decided I would make raspberry jam.

After a bit of googling of raspberry jam recipes I decided on a 100% ratio of fruit and sugar. And looking at a few blogs I decided I would try 20 mins, 100 degrees, speed 2.  Then a few extra minutes on steam temperature speed 2 if needed to thicken it up!

Here is my recipe…

500 grams frozen raspberries

500 grams raw sugar

1) Before you start, pop a small plate in your freezer.  You will need this for testing if your jam is done!

2) Place frozen raspberries in bowl then sugar on top.  I decided I would do it this way to aviod the sugar all sitting on the bottom of the bowl and reduce the chances of burning.

3) Set machine for 20mins, speed 2, 100 degrees.

4) Make a decaf coffee, sit down, watch Grey’s Anatomy and wait for the beep. (Oh wait, that’s what I did. You can chose your own activity!)

After about 7 or 8 minutes the smell of jam was wafting through the house. My husband, who was in bed reading, kept commenting on how good it smelt!

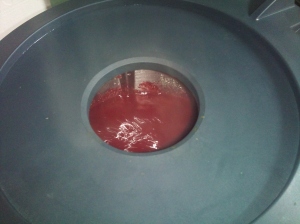
This is taken at about the two minute mark when I remembered that I had planned to take photos of this process!

5) When the 20mins is up, grab your plate out of the freezer and take a teaspoon of your jam and drop it onto the plate. I am impatient so I placed the plate back in the freezer for a minute or so.

The story is, if you scrape the jam and it wrinkles, it is ready. Mine wrinkled, but not very much. So I thought I would give it a couple of minutes on steam temperature, speed 2 to thicken it up a bit.

6) After two or so minutes I tried the plate test again (I had put the plate back in the freezer) and was happy with the results, so decided I was done!

7) I let the jam cool slightly then poured it carefully into two hot jars (see note below) and popped the lids on for them to cool on the bench over night.

In the morning the jam was set solid, REALLY solid. I think next time I will stop it after just the 20 minutes. By all accounts it still tastes fantastic!

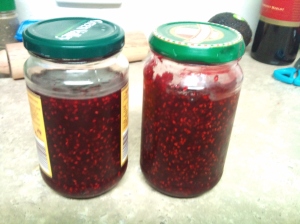
Two large jars of very very yummy raspberry jam!

I think next time I will add the juice of a lemon. I felt the jam was missing something and I think lemon juice will hit the spot.

Again, the clean up was so easy – I had run out of hot water by this stage, so just boiled the kettle and added 600mls boiling water and 400mls cold tap water and again put the machine on for 20 seconds, speed 8. I gave it a bit of a wipe and pulled the blades out to give them a wipe separately and it was all fine! I was very happy!!!

I can recommend making jam in the Intelli Kitchen Machine. Made in less than 30mins, from go to whoa and far cheaper and more natural product than you will find on the shelves at ‘the big two’.

**Note – to get the jars hot and clean, I had washed them in the dishwasher earlier in the day. Whilst the jam was cooking I quarter filled the jars and popped them in the microwave for 5 or so mins so that the water boiled for a couple of minutes you may need to adjust the time for your own microwave). when they are done I carefully removed the jars using a tea towel to stop me burning my hands and poured the water over the lids of the jars.

Using this method, you will be pouring hot jam into hot jars and will reduce the risk of the jar cracking from the change in temperature. I also used this method for the vegetable stock)

Good luck everyone!

What great meals and treats have you made in your Intelli?

Superchef Maxi recipe booklet

Hi all,

It seems that the Superchef Maxi recipe book has been blocked from public consumption. Which is a shame really… It would be nice to think that Superchef and Intelli owners could share recipes and the love!

I managed to print it off when I first saw it on-line, but didn’t save it!

Although – I have found if you Google search the full link provided in a previous comment (http://maxika.com.au/sites/default/files/pdfs/SuperchefRecipeBook.pdf), then without clicking the link, but clicking ‘quick view’ to the PDF you may be able to access the booklet…

Remember it is a different machine, so recipes may not translate exactly to the Intelli (although the couple I have tried over the weekend have been fine).

Good luck everyone!

Leah

Update on Elli, V2!

OK, I know I have been missing in action but with good reason.

Let me fill you in…

My first Intelli Kitchen Master kacked it basically… Firstly the base burnt, then the blades were stuck and I couldn’t get them out.

After being told by Target that the machines were on recall, I called GSM (who have been fantastic and the customer service has been wonderful) to discuss getting a replacement bowl. I was surprised to hear they were not at all on recall and GSM were taking the details of anyone who wanted a replacement product. The story was that the original Kitchen Master obviously had issues. The producers of the product in China were re-working the machine with a few software updates and the new machines would be available mid July in Australia. They also told me they would arrange a courier to deliver the replacement product and pay for a courier to pick the old product up. I added my name to the list of replacements, and have waited…

Last week I received a call from GSM saying that stock had arrived in the country and was in the process of being distributed (and to check I hadn’t returned my machine for a refund to Target).

I think from memory, the distribution was starting today (Monday 23rd July), so fingers crossed I should see my new friend this week!

I am very excited as in the mean time, I have been using Elli (very carefully) and the machine stopped holding heat. Or stopped heating up at all actually… Very inconvenient for me who had been using it as a rice cooker!

I am still using her as a high-powered food processor, mainly for breakfast smoothies!

I haven’t been blogging about my experience whilst it is not working properly as it would just be unfair to comment on a product that isn’t working. We all know the issues the first model had, lets hope that the next model is fantastic!

It seems a few of you may have already purchased the new model – how is it going? what have you made?

It also seems as though you are all after a place to share recipes for the machine? I am not all that techno savvy – but we can try to sort something out… If you have a great recipe you would like to share, I am happy for you to email me and I can pop it on this blog as a guest blogger to at least start getting the love out there!

Maybe a forum similar to that of the thermomix one would be useful?

Thoughts?

Happy cooking!

Burnt base – quick update

I am shattered.

Last night I tried to whip up a risotto for a beautiful friend of mine who has torn her calf. But it proceeded to burn so badly that not long after I added the cooking liquid after adding the rice, the smell was so bad I had to discard the whole batch…

I even tried finishing cooking it on the stove to see if it was salvageable though, which is wasn’t. 😦

Will be calling Bellini today to discuss this and the fact that I still can’t get the blades out…

So upset. Will write a better post tonight with pictures of the burn marks and how I went with the manufacturer. Wish me luck! (And the fantastic dip I made yesterday morning, yum!)

Introducing Elli… Elli, the intelli!

OK, first things first.

I should explain why I have named a kitchen appliance.  I have two reasons.

I figure that I will be talking/writing and based on last night, dreaming about it a lot, and it feels nicer to call it something more personal than The Bellini Intelli Kitchen Master.  And secondly, I realised it is the most expensive thing in my kitchen bar the stove and dishwasher, so it deserves a name!

After much discussion, my son (who is seven) and I decided on Elli – Intelli shortened!

I picked Elli up yesterday afternoon. Transported her carefully home and then went for broke!
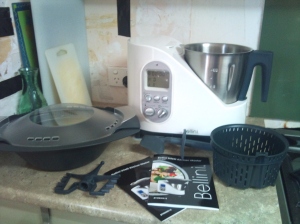
Pride of place on my kitchen bench!

With only a brief interruption for Little Athletics, Elli and I smashed out butter (Yes, I did it! Details later!), a cream cheese dip, a risotto and mayonnaise.

And today I made raspberry sorbet and a vegetable concentrate (stock).

We did go a little crazy, but boy are we a good team!

The Intelli is very easy to use. To be honest I just winged it a lot last night whipping up things without even looking at the instruction manual. The buttons are well labelled and quite self-explanatory.

I started with butter as planned.

I got lucky yesterday morning and found Devondale thickened cream marked down so grabbed that to try my first batch of butter.

I didn’t have a particular recipe I was following, but found many on-line which I tried my best to learn as much as I could.  One particularly helpful clip was this one on YouTube as it gave me a good visual reference.  You can find it here http://www.youtube.com/watch?v=7_51TFFNWo8

I also have researched the process a little by reading a few blogs and the Thermomix Forum site which is http://www.forumthermomix.com/index.php

So I set Elli up with the butterfly (stirring) attachment installed and tipped in the 600ml of cream. I turned it up high – speed setting of between 6 and 8 depending on how it sounded. I was listening for a thumping or slapping sound to alert me that the cream was over whipped and the fat (butter) had separated from the buttermilk.

I didn’t really hear the slapping noise, but i had a busy kitchen with two kids and my mum watching my efforts, so when I checked to see how it was going for about the millionth time (through the hole in the lid, be careful, it can be messy as it sputters everywhere!) I could see that it had separated.

I followed the vague instructions that I had found and tipped what I had into the strainer attachment over a bowl to catch the buttermilk. I then squeezed out what I could of buttermilk from the butter and returned it to jug with 500ml of cold water. I took the butterfly (stirring) attachment out and blitzed it again at speed 6 for about 15 seconds.
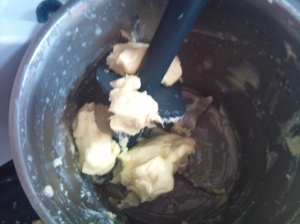
This what the butter looked like after the first squeezing, but before the water wash

This what the butter looked like after the first squeezing, but before the water wash

This step washes the butter and ensures that more buttermilk is removed.  From what I have found online, it is the buttermilk that goes rancid so it is important to remove as much of it as you can.
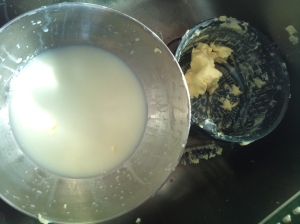
The saved buttermilk

The saved buttermilk

Again, I drained the butter in the strainer bowl but discarded the liquid this time.

I squeezed as much out as I could and in the process tried my hands, a chux cloth and in the end wrapped it in some good quality kitchen paper and wrapped it in that and squeezed. I found that this made me feel the most confident of getting everything out of the butter.

After that, I popped what I had in a ramekin, then into the fridge. All the while hoping for the best!

After an hour or so, it had hardened up like real butter and I felt happy that I had completed my first and certainly not last batch of homemade butter!
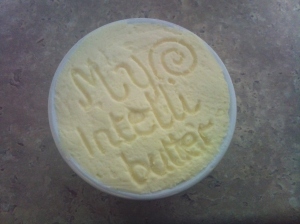
My Intelli butter!

My Intelli butter

This recipe made about 200gr of butter and I have been able to freeze about 200ml of buttermilk to add to savory muffins next time I get the baking bug.

I do realise that I started with 600ml of cream and only really came out with 400gr of product, but as my mum kindly pointed out with a cloth in her hand, I did make a ‘bit’ of a mess, and the other 200ml/gr could probably be accounted for in that respect!

I had so much fun and I am happy with the finished product. I am waiting to see how it holds up, because if it goes off in the next couple of days I will know I didn’t get all of the buttermilk out and will have to search for a better way.

I will make butter again and experiment with the flavors. I will salt some, and make herb and garlic butter, I may even try to make spreadable butter in the future.

I can recommend giving this a try, it really isn’t hard and you get a really great product at the end!  Worst case scenario, you may waste a 600ml tub of cream. Not a huge loss and you can always try again!

One tip I did read nearly everywhere was to use cream with at least 35% fat content. No such thing as low-fat butter I guess!

I know I said I made loads of things over the last 24 hours, but the butter was the only recipe I was really happy with.  The rest of the products I made need some adjustments to flavors before I put then on here!

Downsides

I guess I should talk about the downsides that I have found so far.

After I made my risotto last night I had two burn marks on the bottom of the jug. I was pretty upset, but got it pretty well cleaned up, and it didn’t affect the flavor of the food.
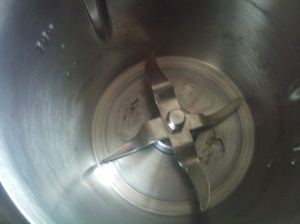
Burn marks after the first night  - this is after a good clean

Burn marks after the first night - this is after a good clean 😦

Today when I made the vegetable concentrate I had the same two burn marks, but tonight I could not for the life of me get the blades out to give it a good scrub. The switch on the bottom of the jug to release them wouldn’t budge. Even my husband couldn’t get it to flick across, so I soaked the base of the jug with some bi-carb soda and water and did what I could, but didn’t come quite as good as last night.

I will try the blades again tomorrow and if I still have no luck I will call the manufacturer Monday or Tuesday for advice.

These two things I wouldn’t expect to find in a Thermomix.

But in the greater scheme of things Elli, so far, is shaping up as a very valuable addition to our family!


Let me know if you have one and how you are finding it. Or, do you make your own butter another way?

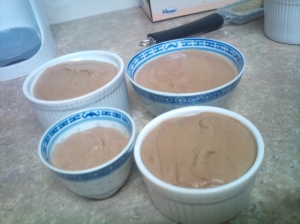
My Intelli Experiment

OK, so here it is. My first blog post.

I will try to set the scene for what I expect this blog to be about in future. But, be warned, I am a woman and this is a blog, so it really could end up VERY different to how I had imagined.

I have recently been introduced to the wonders of the Thermomix (TM). And like everyone who has had a good show through of the amazing machine that it is, I have to have one.

Only thing stopping me (I even have hubby on board), is the price. At around $2,000 it just isn’t going to happen any time soon.

So when I received a text from my girlfriend, lets call her G, about the Bellini Intelli Kitchen Master including that it was on sale at Target for only $269, you can imagine that my interest peaked.

I looked at the website, and to be honest it was pretty light on with information. I really wanted to know what the temperature ranges were (lowest-highest) as I would like to investigate a raw food diet and I know that the TM has a 37 degree setting which keeps food technically ‘raw’. And if it had a reverse stirring action, something that the Thermchef doesn’t have.

 After more searching, I had decided to let G buy one, and see how it went whilst still trying to save for the real deal.

Whilst slightly deflated I was comfortable with that decision until about two hours later when I started researching again and chatting to G more about it. By that time Bellini had uploaded the instruction manual and recipe booklet.

It gave me some answers… No, it doesn’t do the reverse action that the TM does and the temperature settings are from 40 – 130(?) degrees. I am not sure that it will keep my food ‘raw’, but I will do more research at some stage and come back to that, and it does not have scales. (Not a big deal I have a set of digital scales that I use all the time.)

Reading the recipe booklet made me hungry and gave some answers on how to get around the non-reversing action. It seems by adding the ‘butterfly’ attachment this alleviates some of the over chopping action. Apparently that is how the Thermochef recipes get around it too.

After a final discussion with hubby, and realising there was 12 month warranty from Target we decided that we would risk the $269 and get one.

G stalked out local Target and purchased one for herself and popped one on layby for me this morning so I can head down over the weekend to pick it up. I can’t wait to start playing with it! I have already cleared the bench space for it to sit pride of place in my kitchen.

The first thing I want to make is butter. Butter is something I have always wanted to make, but I don’t know why. We rarely use it. Maybe it is the part of me that loves real food and getting back to the basics of life.

I will try it out, see how we use it in terms of how often, what types of food and whether this is another kitchen appliance I HAVE to have, but then turns into a space stealer in a cupboard. (I do love a kitchen appliance!)

I am hoping that this blog will become a repository of recipes that I try and how they hold up.  Lets see how that goes. And I will try to take many photos. Everyone loves a good picture!

 So this is My Intelli Experiment.  

Please join in, I love a chat and hearing other people’s points of view, especially about food.

Please don’t be nasty, there really is no need.

Tell me about your food passions. If there is one thing that I love more than kitchen appliances, it is food.

Along with the journey of My Intelli Experiment, I am sure you will get to know me better. Fingers crossed this is a good experience for one and all!!

Note – Just to be clear, I am not buying this with the expectation that it will be anywhere near as good as a TM. But I am investing a little bit in the way of cooking and life that a TM could bring me in the future.